Brother Scan N Cut - Applique Pattern Tutorial
 I recently borrowed a Scan N Cut machine from Rebecca at work (I know you are reading this- hello!) with the promise that I'd teach her stuff after I'd used it and learned a bit more. So it makes sense to share what I found here too for anyone who has just bought a Scan N Cut and are a bit nervous as to what to do next.I tested it out with a new mat and an applique pattern that I bought (part of the Canadian Mystery Quilt series by Shania Sunga for Cantik Batiks), but you could save files from EQ7 and other computer applications such as Adobe CC instead of scanning them in, use the Scan N Cut Canvas web program to convert to cutting lines, put them on a USB stick and cut your applique patterns from the file.I'm going to say now that yes I have used my fingers on the screen and yes, there is a stylus provided, I think with touch screen phones and stuff that we are used to, it's easy to fall into that habit!
 Scan the pattern by sticking it to the Standard mat, pressing the mat load button and then the Scan option, followed by Scan To Saved Data and the Go button that will light up green when ready.
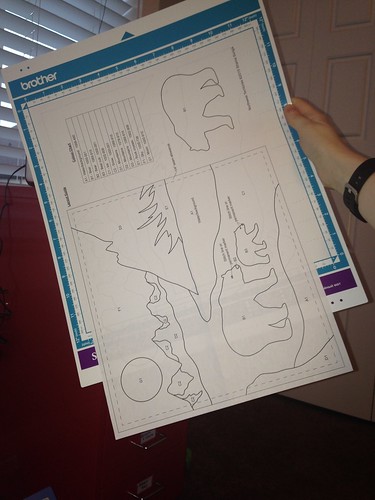
 This model is the CM550 Scan N Cut, which can only scan 12" x 12" mats, the pattern sheet was longer than this so I had to scan half, rotate and scan the other half to make sure I got all of the pieces. The Scan N Cut 2 (CM650) can scan 12 " x 24" which is handy. These will then save to the memory on the unit itself, or a USB stick if you have plugged one in and you choose that option.Next, fuse Wonder Under or another good fusible product onto the back of the fabrics you want to cut from (everything but the background). Press well as you don't want the fabric to separate from the adhesive when you come to peel your shapes from your mat!To recall your saved scans, press Home and go into Pattern, Saved Data...
 Locate and select the saved file you want to cut from...
 Now we will refine the shape for cutting and get rid of any extra fragments that scanned in that you don't want, such as text and fluff. When the file is open, click the top right "Edit" option...
 Then "Selection" - the three red boxes...
 "Select All"
 Select the parts you want to keep- so in this example that was just the bear shape...
 Press OK, then the dustbin icon...
 A message will ask if it is OK to delete selected data- yep, sure is! Now all that's left are the shapes you want! You can save the design and overwrite the existing file if you wish.I have found that the mats don't last quite as long as I would like, so instead of cutting with the fabric side down and the fusible web up, I mirror the images and stick the paper to the mat because that way there's less fluff and lint getting on the adhesive surface. Here's how I did that.Go into the resize screen...
 I started by rotating the bear as I wanted the grain of the fabric to run top to bottom and left to right, and initially the bear was angled on the bias...
 Select the mirror image icon (it's the same as the mirror pattern button you might have on your sewing machine)...
 Click OK once you're happy with what you have. You can move the applique design around on this screen too by selecting and holding it with the stylus/finger, then dragging it to its new location.Smooth your fabric with the backing side down onto the standard mat if it is old and losing it's stick, or onto a low tack mar, covering the area shown on the screen that will be cut. Those inch square marks are really handy. (BTW: if you are wanting to use a high tack mat, don't mirror your design and put the fabric side down, you'll thank me later)
 Time to cut! Load your mat. I have the blade set on number four. Sometimes I find the blade needs setting one higher than it actually recommends in the manual to make sure I don't have to snip any extra areas. Click cut and then the Go button should light up green. Deep breath and press it!
 Once cut, press the mat load button to eject the mat. This is where your pressing skills with the fusible web will show their level... Peel off the excess fabric, then prose up the cut out shape with the provided spatula. Make sure to get under the paper, not just the fabric. I found I had to curl the mat back slightly to get better purchase on it.
 Et voila!
 Now its ready for the backing paper to be peeled off and to be fused on my project. I repeated this with all of the pieces in my block (including the background because I'm dim sometimes, so I just fused the whole thing to batting).Another tutorial coming up in my next post - how to use the Scan N Cut to cut out fabric for piecing, and adding seam allowances. We are selling these machines at work for $240 for the basic model so I think I'm going to have to get my own!