Tutorial : How to make your own quilting templates
 Please note this tutorial calls for a bit of computer design knowhow (or software at least) in order to draw a design and print it to the size you want it, but I'll briefly go over a couple of options! You could also draw your design with pencil and paper if you wish.I decided the pancake quilt deserved a little more than an unprecise thrashing with my usual FMQ fallback patterns, but equally I'm a bit too cheap to buy loads of quilting stencils in different sizes, so I had to make my own template!YOU WILL NEEDA computer and printer, or a design already on paper at the right sizeA permanent markerTemplate plasticX-Acto knifeOld (or useless metric!) cutting matFirst off you will need to design your quilt pattern. You could do what I did and choose one in Electric Quilt and size it to the size of the block....Or you can create a drawing in Illustrator or suchlike. As long as it's just a line, and preferably just the one continuous line then it's a possible quilt pattern.Print it out actual size.
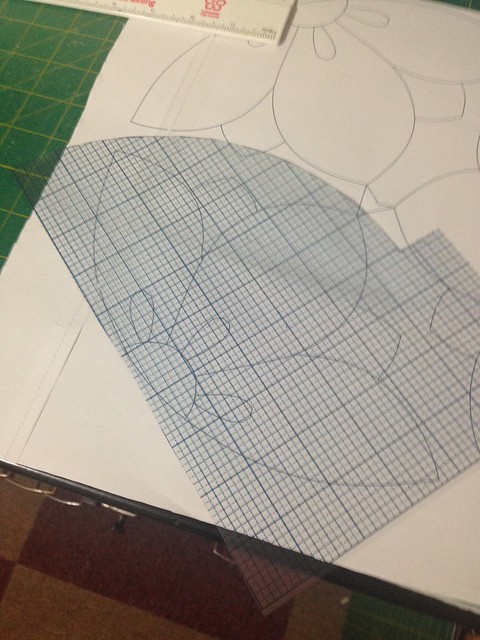
 Lay your template plastic over the top of the design and trace it with your permanent marker.
 Take away your paper and set the template plastic over your cutting mat. Don't cut it out just yet! Take note of where the line crosses and ensure you leave a gap between lines that cross so that all parts of your template- such as the centre of loops - remain intact!Get cutting! Make sure your blade is sharp and take care of where your free hand is, and other safety disclaimers- make sure small children and excitable puppies aren't around, for example. Cut in small tiny strokes around curves and on straight bits, use a metal rule if you have one and try and keep the cuts as long as possible.
 Cut a line parallel to your first and join the two cuts at the ends to create a channel that has been removed. Continue around the stencil to complete it.
 Now you can mark your quilt through your stencil using your preferred medium- air erasable or washable marker, Frixion pen if that's your bag, or chalk. Sew along the marked line when quilting and join up where the gaps are with your stitches!
 ***If you don't want to use plastic, knives and markers, another way to do it would be to print out your design on paper, over lay it on your quilt, and use small stitches to quilt through the paper, tearing it away when finished. Three negatives to this technique - It puts stress on the quilt stitches when removing the paper, it uses quite a bit of paper and you can't get the placement just so like you can with clear template plastic. Still, this may be a better option for you- if you try either of these methods, please let me know how you got on!